




5 Steps to Submit Dental Claims Online
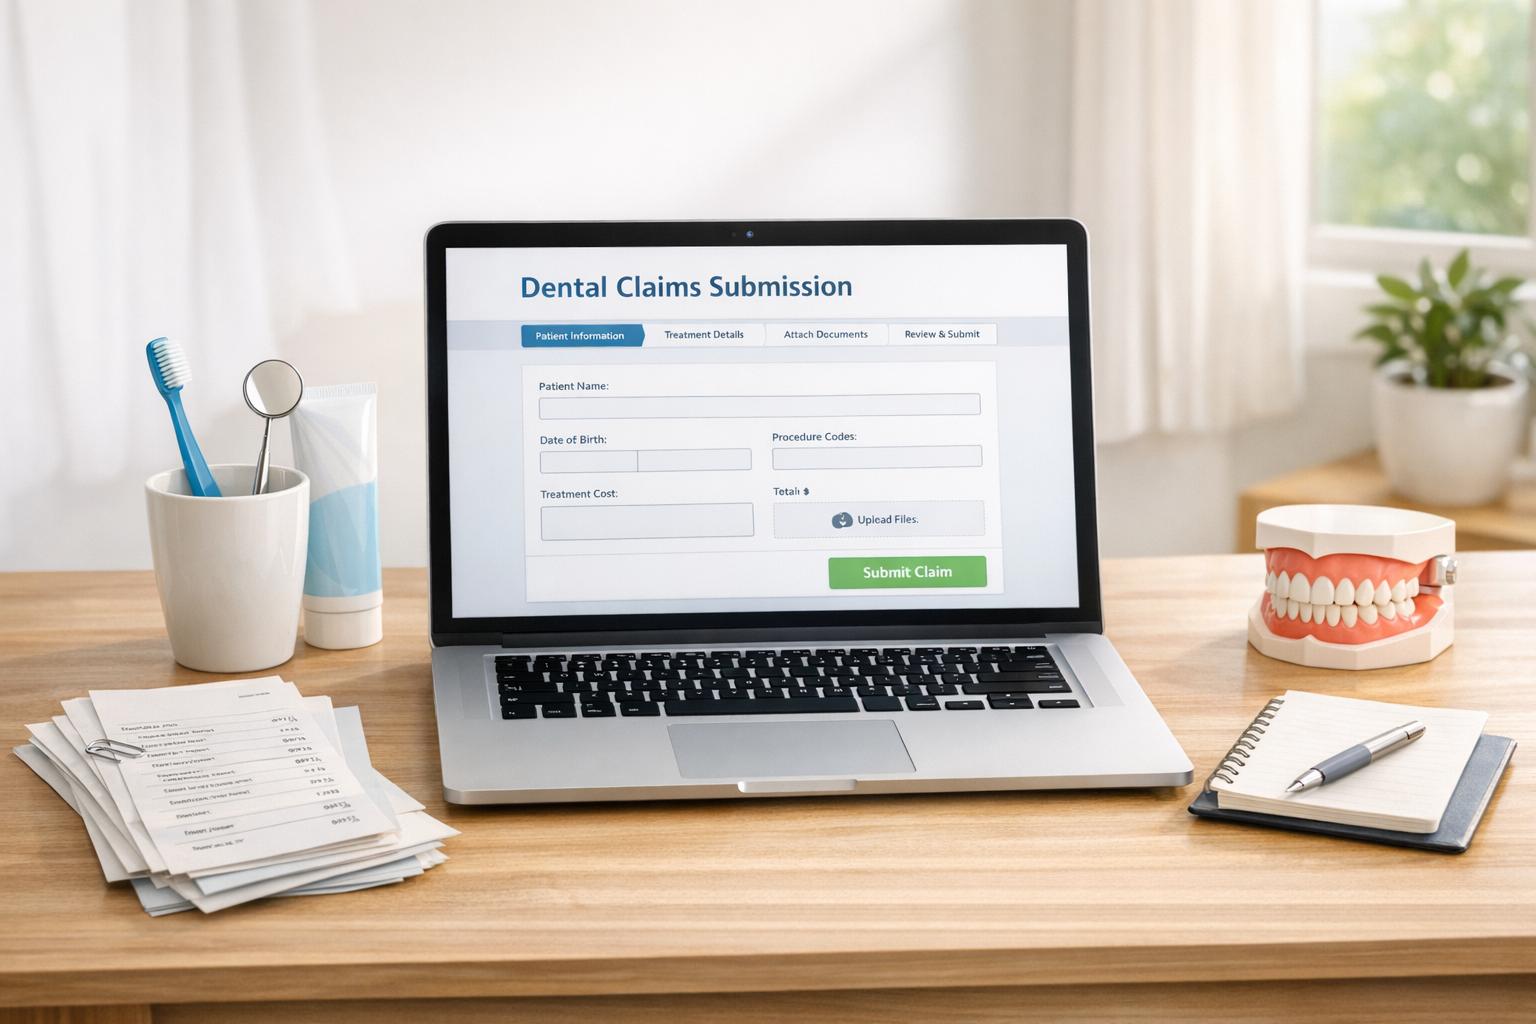
Submitting dental claims online can save you time and effort compared to mailing forms. Here’s a quick rundown to simplify the process:
- Check Your Coverage: Confirm your treatment is covered, review limits, and ensure it qualifies for online claims. Most funds won’t accept claims for services older than two years.
- Gather Documents: Collect an itemised receipt with all necessary details (e.g., provider name, item numbers, service date).
- Log In to Your Portal: Access your health fund’s app or website, and locate the dental claims section.
- Enter Details: Input treatment information, upload clear copies of receipts, and double-check payment and bank details.
- Submit and Track: Submit your claim, save the confirmation, and monitor its status online.
Most claims are processed within 3–5 business days. Double-check your receipts for clarity and accuracy to avoid delays or rejections. If issues arise, contact your health fund with your reference number handy.
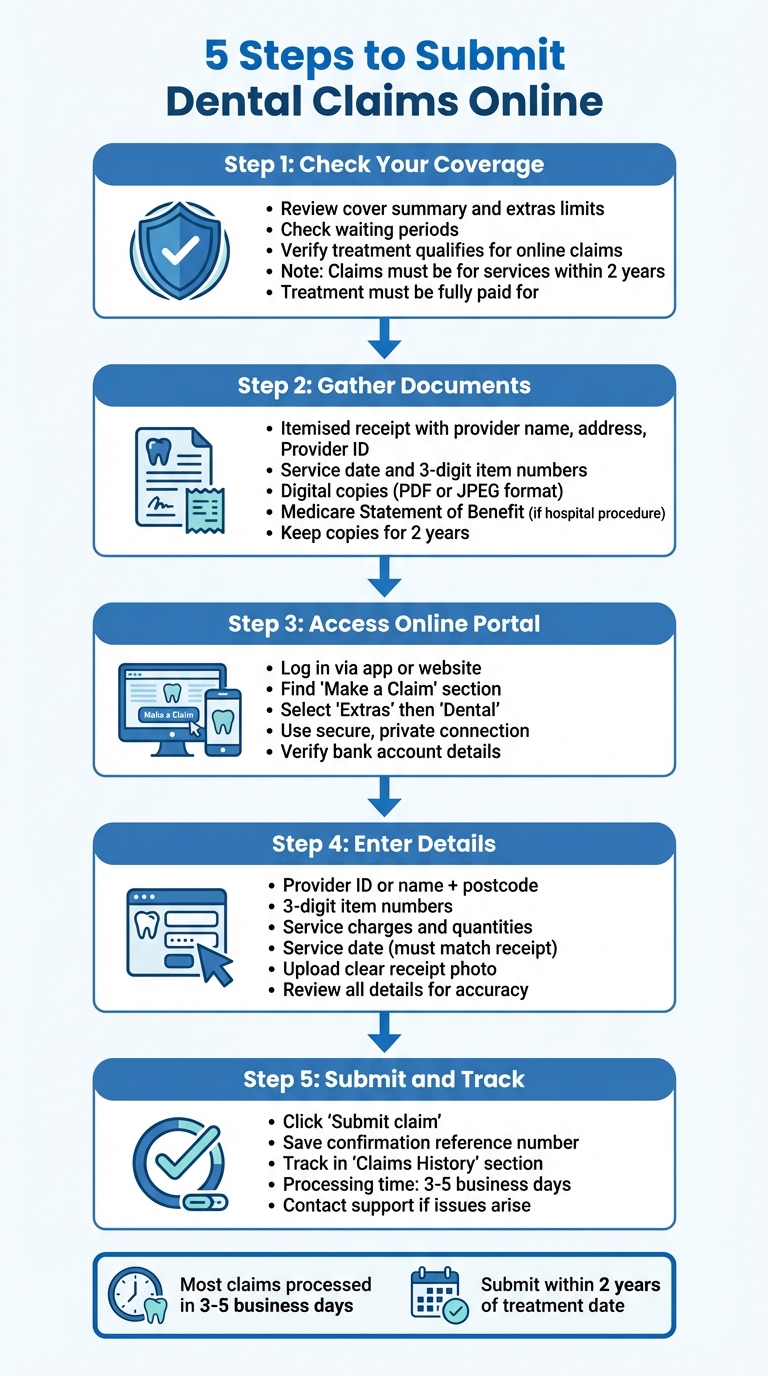
5 Steps to Submit Dental Claims Online – Complete Process Guide
Step 1: Check Your Coverage and Claim Eligibility
Before moving forward, make sure your treatment is covered and eligible for a claim. Log into your member portal or app to review your cover summary, extras limits, and waiting periods.
"If you’re not sure whether you’re eligible to claim, you can check your cover summary, as well as limits and waiting periods, on My Medibank online, or the My Medibank app" [1].
Review Your Dental Policy Details
Dental policies typically include three main categories, each with its own limits and waiting periods: general dental, major dental, and orthodontics. Here’s a quick breakdown:
- General dental: Covers basics like check-ups, cleans, X-rays, simple extractions, and wisdom teeth removal.
- Major dental: Includes crowns, bridges, complex fillings, and endodontics.
- Orthodontics: Covers treatments like braces and aligners.
For Medibank members with extras cover, there’s a perk: you can claim 100% back on two check-ups and cleans annually, which also includes up to four bitewing X-rays – provided you visit a Members’ Choice Advantage dentist [6]. If wisdom teeth removal happens in a clinic, it’s claimable under extras. However, if it involves hospital theatre and accommodation fees, those are handled differently [6][4].
Check If Your Treatment Qualifies for Online Claims
To claim online, the treatment must be fully paid for. Medibank clarifies:
"If you haven’t paid for the service or product yet, you can only make an offline claim" [1].
For dental surgery performed in a hospital, you might need to split the claim. The dental portion would go through your extras cover, while the medical portion (like anaesthetist fees) would be processed via Medicare [4]. To confirm eligibility for online claims, head to the "Make a Claim" section in your app and check if "Dental" or "Orthodontic" appears in the list of claimable categories [1][5].
Be Aware of Claim Time Limits
Most Australian health funds enforce a two-year deadline for submitting extras claims. For example, nib states:
"Confirm your service is within the past two years. We can’t pay claims after this period" [3].
Australian Unity follows the same rule [7]. The key is the service date listed on your itemised invoice – it determines whether your claim falls within the allowed timeframe. To avoid missing out, submit your claim as soon as you receive your invoice. Paper receipts can fade over time, so keeping digital copies is a smart move for better record management [3].
Step 2: Gather Your Documents
Once you’ve confirmed your eligibility, the next step is pulling together all the necessary paperwork. The most critical piece is an itemised receipt or invoice from your dentist. This receipt needs to include the provider’s name, address, Provider ID, the date of service, and the specific 3-digit dental item numbers for each treatment. A generic receipt that just says "dental services" with a total amount won’t cut it – each service must be listed separately, complete with its code and charge.
Collect All Required Documents
To submit your claim, make sure you’ve got everything you need. Your receipt must show that the balance has been paid or cleared. Additionally, you’ll need your dentist’s Provider ID or their full business name and postcode to locate them in your health fund’s system. If you’ve undergone major treatments like crowns or root canals, you might also need to provide extra paperwork, such as X-rays, chart notes, or a treatment plan. For dental treatments performed alongside hospital procedures (like anaesthesia), you’ll need a Medicare Statement of Benefit to handle the medical portion separately.
Get Digital Copies Ready
Before submitting your documents, check that they’re in standard formats like PDF or JPEG. If you’re taking a photo or scanning your receipt, make sure it’s clear and easy to read – every detail, from item numbers to costs, needs to be sharp and legible to avoid any delays. Apps that capture receipt images can make this process easier. Also, ensure that essential details like tooth numbers and treatment dates are visible. Missing information can slow things down, so double-check everything before uploading.
Save Copies for Future Use
Keep digital copies of your receipts, claim confirmations, and remittance statements on file for at least two years. Most Australian health funds won’t accept claims for treatments older than this, and you might need these records for further verification down the track. Well-organised digital records can help you track your annual extras limits and quickly resolve any discrepancies. Plus, having backups prevents issues with faded or lost paper receipts down the line.
Step 3: Access Your Health Fund’s Online Portal
Once you’ve gathered your documents, it’s time to log in to your health fund’s online portal using your membership details. If you’re a new user, you’ll need to complete a two-step email activation process. Keep in mind that the activation link is only valid for seven days[1].
Log in to the Portal or App
You can access your health fund’s services either through their official app – available on the Apple App Store or Google Play Store – or directly on their website. Look for the ‘Member Login’ or ‘Online Services’ button. For members aged 16 and over, unique login credentials are required for each account. Once you’re logged in, head to the dental claims section to proceed with your submission.
Find the Dental Claims Section
After logging in, go to the ‘Make a claim’ or ‘Claims’ area and select the ‘Extras’ option. It’s also a good idea to check your remaining annual limits under the ‘Cover Summary’ or ‘My Extras’ tab. Once you’ve located the claims section, be sure to prioritise security as you move forward with your claim.
Prioritise Digital Security
To protect your personal information, always use a private and secure internet connection – steer clear of public Wi-Fi. Choose a strong, unique password and never share your login details with others. When you’re done, log out completely instead of just closing the app or browser.
For added security, enable SMS or email notifications in your communication preferences. This way, you’ll get real-time updates on your claim’s progress and any potential security alerts. Before submitting your claim, double-check that your reimbursement bank account details are correct in the ‘Payments’ or ‘Account’ section to avoid any delays. Taking these precautions ensures your information stays safe while you complete your claim submission.
sbb-itb-2be92ed
Step 4: Enter Treatment and Payment Details
Now that your secure connection from Step 3 is in place, it’s time to carefully input your treatment and payment information.
Enter Treatment Details
Start by entering your dentist’s Provider ID. If you’re unsure of the ID, you can search by the provider’s name and postcode. Next, input the 3-digit item numbers from your receipt, the charge for each service in AUD, the quantity of services, and the total amount you paid[1][4][5]. For some procedures, you’ll also need to specify the tooth number and the surface treated[8]. Double-check that the service date matches exactly with the date on your receipt[1].
It’s also important to indicate whether the service has been fully paid for, as most health funds only accept online claims for services that have already been settled[1][4]. Lastly, confirm that your bank account details – account name, BSB, and account number – are accurate to avoid delays in processing[1][2].
Upload Supporting Documents
Upload a clear and complete digital copy of your itemised receipt. Wait for the upload to finish completely before proceeding[1][3][9]. The receipt must include key details such as the service date, provider name, provider registration or ABN, patient name, and an itemised breakdown of the services[9][7]. If you’re claiming specific items from a larger receipt, mark those items with an asterisk or underline them. Avoid using highlighters, as they can make text unreadable for processing software[9]. Once your receipt is uploaded, carefully review all the details you’ve entered.
Review Before Submission
Take a moment to review everything for accuracy. Ensure the name on the claim matches the name on the receipt, especially if your policy covers multiple dependents[1]. Verify that all details – such as the service date, item numbers, quantities, and charges – align perfectly with your receipt[1][4]. Keep in mind that most funds won’t process claims for services older than two years[3][7]. Confirm that your treatment falls within this timeframe before submitting your claim.
Step 5: Submit and Track Your Claim
Once you’ve entered your treatment details in Step 4, here’s how to submit your claim and keep an eye on its progress.
Submit and Save Your Confirmation
After double-checking the information you entered, click ‘Submit claim’ or ‘Next’ to finalise the process. A confirmation screen will appear, summarising your claim details. Make sure to save or screenshot the reference number displayed. This number is important – it’s your proof of submission and will help you track your claim or resolve any issues later.
Now that your claim is submitted, it’s time to monitor its progress.
Track Your Claim Online
Most claims are processed within three to five business days[3]. To check on yours, log into your portal or app and head to the "Claims History" or "Check the status of your claim" section. The status will update as your claim moves through the system. For example:
- ‘Awaiting Processing’ means your claim is still being reviewed.
- ‘Paid to you’ confirms the benefit has been approved and deposited.
- ‘Rejected’ indicates the claim wasn’t approved, usually with a reason provided.
Some providers, like nib, may also send you notifications once your claim is processed, whether it’s approved or rejected.
Handle Delays or Issues
If your claim hasn’t been updated after five business days or you receive a rejection, check the portal for more details. Look for an explanation of the issue. If it’s unclear, contact your health fund’s support team with your reference number and original receipt handy. It’s a good idea to keep your receipts for at least two years, as your fund might request them for additional verification.
Conclusion
Submitting online dental claims can be straightforward if you follow a few key steps. Start by checking your policy to confirm what’s covered and your benefit limits. Make sure you have itemised receipts that clearly show provider details and the 3-digit item numbers for treatments. Then, log into your health fund’s portal, accurately enter the treatment details, and upload a clear photo of your receipt – blurry images can lead to delays or rejections [3].
Most claims are processed within three to five business days, but keep in mind they must be lodged within two years of the treatment date [3][7]. Health funds often have unique rules, so some claims – like unpaid invoices or specific services – might require manual forms instead of an online submission [1][4]. If you’re unsure about your coverage or run into any issues, reach out to your health fund’s member care team and have your reference number handy.
Many dental clinics also offer electronic claiming options for on-the-spot processing. By ensuring your documentation is accurate and complete, you can help speed up the process and make your claim hassle-free.
FAQs
What can I do if my dental insurance claim is denied?
If your dental insurance claim gets denied, the first step is to check the details through your insurer’s online portal or the notification you received. This should outline the reason for the rejection and any steps you can take next. If the explanation isn’t clear, don’t hesitate to contact your insurer directly for more information.
Next, gather all the necessary documents to support your case. This might include receipts, detailed treatment notes, and supporting materials like X-rays or photographs. Make sure everything is clear, complete, and dated within the last two years. Once you have everything, write a formal appeal. Include your policy and claim details, the reason for the denial, and a concise explanation of why the treatment was essential.
Submit your appeal within the timeframe specified by your insurer – this is typically within six months of the denial. Be sure to keep copies of all your documents and correspondence, and monitor the progress of your appeal closely. If your appeal reaches the final stage and is still rejected, you can take the matter further by contacting the Australian Financial Complaints Authority (AFCA) or your state’s health insurance ombudsman for an independent review.
What can I do to ensure my dental claim is processed quickly online?
To ensure your dental claim is processed quickly, upload a clear digital copy of your receipt in formats such as JPEG, PNG, HEIC/HEIF, or PDF. The receipt must include essential details like the provider ID, item number, and the date of service. Before submitting, double-check that your insurance coverage, limits, and waiting periods are in line with your claim. Fill out all the required fields in your online portal or app accurately, and don’t forget to provide your bank account details to receive reimbursements faster.
What should I avoid when submitting dental claims online?
Submitting dental claims online doesn’t have to be complicated, but there are a few common missteps to avoid. First, make sure the treatment matches your policy. Confirm the procedure is covered, check that you haven’t exceeded any limits or waiting periods, and ensure the service was provided within the approved timeframe. Second, include a clear, itemised receipt with your claim. This should show procedure codes, the provider’s ID, and the exact date of service. Make sure the file is easy to read and submitted in an accepted format like JPEG, PNG, HEIC/HEIF, or PDF. Third, when filing electronically, stick to items from a single provider or fee schedule. Mixing services from multiple providers in one claim can result in rejection. Finally, double-check your bank details and ensure all required fields are filled out correctly.
By verifying your coverage, using a detailed receipt, keeping claims provider-specific, and ensuring your details are accurate, you can avoid unnecessary delays or rejections. Patients at Complete Smiles Bella Vista can use these steps to make their claims process seamless and hassle-free.
Related Blog Posts
- How to Claim Dental Expenses on Your Tax Return
- Does Insurance Cover Guided Tissue Regeneration?
- Transparent Dental Pricing Explained
- FAQs on Dental Claim Deadlines
Important Notice: Any surgical or invasive procedure carries risks. Before proceeding, you should seek a second opinion from an appropriately qualified health practitioner.
Individual results may vary. The information provided in this article is for educational purposes only and does not constitute medical advice.
Checkout Related Blogs



Get in touch with us
For more information, call us now to start feeling better. Or fill the form below to make appointment
The Latest News from Complete Smiles
How to Clean Clear Plastic Retainers
Checklist for Choosing Wearable Dental Devices
Checklist for Choosing Cloud AI Platforms in Dentistry
Complete Smiles Bella VistaAccepts All Major Health Funds, Including