




Step-by-Step Guide to Inlay Placement
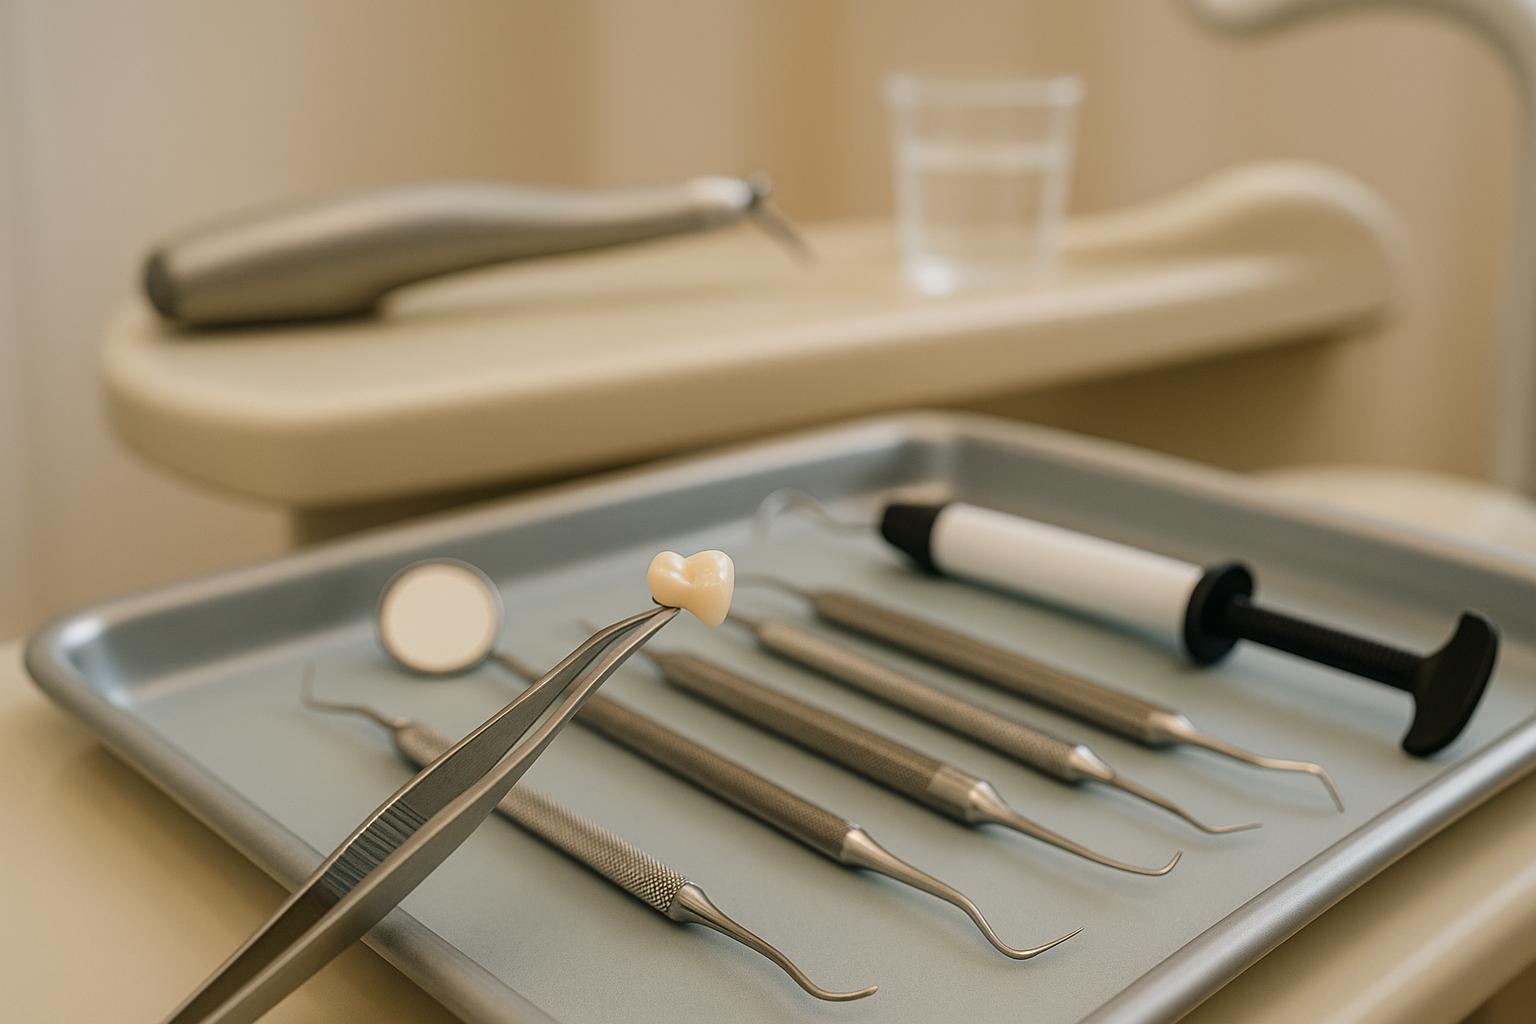
Dental inlays are custom-made restorations used to repair teeth with moderate damage or decay. They are stronger and more durable than fillings but less invasive than crowns. Inlays are crafted outside the mouth and bonded to the tooth, offering a long-lasting solution with materials like porcelain, composite resin, or gold.
Here’s a quick overview of the process:
- Tooth Preparation: The dentist examines the tooth, removes decay, and shapes the cavity.
- Impressions: Traditional putty or digital scans capture the tooth’s dimensions.
- Temporary Inlay: A temporary restoration protects the tooth while the custom inlay is made.
- Custom Inlay Placement: The permanent inlay is bonded to the tooth after adjustments.
Same-Day Inlays using CAD/CAM technology allow for faster treatment, with the entire process completed in one visit. This avoids temporary inlays and reduces waiting times.
| Material | Durability | Appearance | Cost (AUD) | Best For |
|---|---|---|---|---|
| Porcelain | High | Matches natural teeth | $1,200–$2,000 | Visible teeth |
| Composite Resin | Moderate | Tooth-coloured, affordable | $900–$1,200 | Smaller restorations |
| Gold | Very High | Metallic | $1,500–$2,000 | Molars (chewing teeth) |
Choosing inlays ensures durability, aesthetics, and tooth preservation. Regular dental visits and good oral hygiene are essential for their longevity.
Procedures for a Hybrid Ceramic Inlay [Dr. Shon Byungjin]
Tooth Preparation and Decay Removal
Getting the tooth ready is a key step for a successful inlay. This process ensures the restoration fits perfectly and works as it should. Dentists follow a detailed plan to prepare the tooth properly.
Examining the Tooth
Before starting, the dentist carefully examines the tooth to assess the extent of decay or damage and to confirm whether an inlay is the best option [2][3]. This involves a visual check, gentle probing, and X-rays to spot hidden issues like cracks, decay, or old fillings. The dentist also considers factors like the decay’s location, how much of the tooth remains, and how your bite aligns. For example, X-rays help determine if a cracked molar with an old filling can support an inlay [1][2][3].
Applying Local Anaesthetic
To ensure comfort, a local anaesthetic is used to numb the area around the affected tooth. For patients who feel nervous, other sedation options might be available [3][4]. The anaesthetic is injected near the tooth, taking just a few minutes to work. The dentist always checks that the area is completely numb before moving forward. Once numbed, the dentist can safely and carefully remove the decay.
Removing Decayed Tissue
The dentist starts by removing all decayed, infected, or weakened tissue using a dental drill or specialised tools [1][2][3][4]. After this, the cavity is cleaned thoroughly with a disinfectant solution to get rid of bacteria and debris [3][5]. The cavity is then shaped with smooth edges and undercuts to securely hold the inlay. Modern techniques focus on preserving as much healthy tooth structure as possible while avoiding accidental exposure of the tooth pulp [3].
With the tooth fully prepared, it’s ready for an impression to create the custom inlay.
Taking Impressions and Making Custom Inlays
After preparing the tooth, the next step is to capture its exact shape. This can be done using either traditional impressions or advanced digital scans. Traditional impressions rely on a putty-like material to create a mould of the tooth, while digital scans use 3D imaging technology to capture precise measurements. Digital scanning is becoming increasingly popular in Australian dental clinics due to its accuracy and the added comfort it provides patients. Once the impression is complete, the focus shifts to selecting the most suitable inlay material.
Taking Impressions
To accurately record the shape and contours of the prepared tooth, dentists use one of two methods: traditional impressions or digital scans. Traditional impressions involve using a putty material to create a mould of the tooth. While this method is reliable, many practices in Australia now prefer digital scanning. Digital scans employ 3D imaging to capture the tooth’s details without the mess of impression materials, making the process more comfortable for patients and delivering highly precise results. Once the impression is ready, the next step is to choose the ideal material for the inlay.
Selecting Inlay Material
The choice of inlay material depends on factors such as durability, appearance, cost, and the tooth’s location.
| Material | Durability | Aesthetics | Cost Range (AUD) | Best For |
|---|---|---|---|---|
| Porcelain | High | Matches natural tooth colour | A$1,200–A$2,000 | Teeth visible when smiling or speaking |
| Gold | Very High | Metallic appearance | A$1,500–A$2,000 | Molars that endure heavy chewing forces |
| Composite Resin | Moderate | Blends with tooth colour | A$900–A$1,200 | Smaller inlays and budget-friendly options |
Porcelain inlays are widely used in Australia because they closely mimic the natural look of teeth and resist staining effectively. They are ideal for teeth that are visible when you smile or talk. Gold inlays, known for their strength and longevity, are better suited for molars that handle intense chewing. Composite resin offers a more economical option, balancing aesthetics with affordability, particularly for smaller inlays [2] [3].
Laboratory Fabrication
Once the impression is complete, it is sent to a dental laboratory where skilled technicians craft the customised inlay. In Australia, this process usually takes 2–3 weeks, depending on the material chosen and the laboratory’s workload [3] [4]. Using the impression or digital scan, the lab creates a detailed model of the tooth and carefully shapes the inlay to fit perfectly. Porcelain inlays undergo a meticulous colour-matching process using shade guides to ensure they blend seamlessly with natural teeth. Rigorous quality checks are performed to ensure the inlay’s margins, contours, and bite alignment are precise for optimal function and comfort.
Some clinics equipped with advanced CAD/CAM technology can produce inlays on the same day, eliminating the waiting period and the need for a temporary restoration. If this option isn’t available, a temporary inlay is placed to protect the tooth while the permanent one is being fabricated [2] [4].
Temporary Inlay Placement
While your custom inlay is being crafted, a temporary restoration serves as a protective barrier for your prepared tooth. These temporary inlays help safeguard your oral health during the 2–3 week fabrication period by preventing bacteria, decay, and sensitivity.
Placing a Temporary Inlay
Temporary inlays act as a shield for the prepared tooth while your permanent restoration is being made. Before placing the temporary inlay, your dentist will ensure the tooth is clean and dry. These inlays are typically crafted from materials like acrylic resins or temporary dental cements, chosen for their ease of shaping and removal when the permanent inlay is ready.
The material is carefully shaped to cover the cavity entirely and secured with dental cement designed for easy removal at your next appointment. Your dentist will also check the fit and make any necessary adjustments to ensure the temporary inlay feels comfortable and stable in your mouth.
Care Instructions for Temporary Inlays
To keep your temporary inlay secure until your permanent one is ready, it’s important to follow a few simple guidelines. Avoid sticky or hard foods, practise gentle yet thorough oral hygiene around the inlay, and steer clear of extreme temperatures to minimise sensitivity. If your temporary inlay becomes loose or damaged, contact your dentist right away.
Chewing on the opposite side of your mouth can help reduce pressure on the temporary restoration. When flossing near the area, take extra care and follow your dentist’s advice to avoid accidentally dislodging the inlay. Proper care during this phase not only ensures comfort but also helps prevent sensitivity and decay.
Most patients find their temporary inlay to be both functional and comfortable throughout the waiting period. This step is vital in preparing your tooth for the permanent restoration, ensuring a precise fit and reliable protection for years to come.
sbb-itb-2be92ed
Final Placement and Bonding
After about 2–3 weeks, your custom inlay is ready, and you’ll return to your dentist to have it permanently placed. This marks the final step in transitioning from a temporary inlay to a long-lasting restoration.
Removing the Temporary Inlay
To begin, your dentist will carefully remove the temporary inlay that’s been shielding your tooth during the fabrication process. Since temporary inlays are secured with a mild cement, this step is usually painless and doesn’t require anaesthesia. The temporary material is gently loosened and taken out, followed by a thorough cleaning and disinfecting of the prepared tooth. This ensures the tooth is free from debris and bacteria, creating the best possible conditions for bonding the permanent inlay.
Fitting and Adjusting the Inlay
Once the temporary inlay is removed, your custom inlay is placed on the tooth to check the fit. The dentist ensures it sits properly and uses dental floss to confirm it aligns well with the neighbouring teeth. Next, a bite test with articulating paper helps identify any uneven spots or areas of high contact when you bite. If adjustments are needed, they’re made to ensure the inlay fits perfectly and your bite feels natural and comfortable.
Bonding and Polishing
When everything fits as it should, the dentist applies a strong adhesive to secure the inlay. A curing light is often used to harden the bond, ensuring the inlay is firmly seated onto the tooth. Any excess cement is removed immediately to prevent irritation to the gums.
The final step involves polishing the inlay and the surrounding tooth structure. This not only enhances the restoration’s natural appearance but also ensures your bite feels smooth and comfortable. Proper polishing helps reduce plaque build-up, contributing to the long-term success of the restoration. Most patients find the process comfortable, and the inlay feels natural almost immediately. After the procedure, you can eat and care for your teeth as usual, though you might notice slight sensitivity for a short time.
At clinics like Complete Smiles Bella Vista, patients are provided with personalised aftercare instructions to help maintain their inlays. Regular dental check-ups and good oral hygiene are key to keeping your restoration in excellent shape for years to come.
Same-Day Inlay Placement with CAD/CAM Technology
Advances in dental technology have completely redefined how inlays are placed, making it possible to design and fit custom restorations in just one appointment. Gone are the days of multiple visits and long waiting times for laboratory-made inlays. This modern approach builds on the streamlined preparation and impression techniques discussed earlier.
What Is CAD/CAM Technology?
CAD/CAM stands for Computer-Aided Design and Computer-Aided Manufacturing. In dentistry, this technology allows for the digital design and on-site creation of dental restorations. Instead of sending impressions to an external lab, dentists can now design and fabricate precise, custom-fit inlays right in their clinic.
The system includes three key components:
- A digital scanner captures a 3D image of the prepared tooth.
- Software designs the restoration, ensuring it fits your tooth and bite perfectly.
- An in-office milling machine carves the inlay from ceramic or composite material.
Chairside systems like CEREC are widely used for creating same-day inlays, offering patients a seamless experience.
Steps for Same-Day Inlays
The process of placing a same-day inlay typically takes just 1–2 hours [2]. Here’s how it works:
- Tooth Preparation and Scanning: After preparing the tooth, a 3D digital scan captures its exact dimensions, allowing the dentist to design the restoration.
- Digital Design: Using specialised software, the inlay is designed to match your tooth’s unique anatomy. The design considers bite alignment and the contours of surrounding teeth.
- Milling: Once the design is ready, the inlay is milled from ceramic or composite material. This step usually takes 15–30 minutes. Ceramic options, like lithium disilicate, are durable, stain-resistant, and look very similar to natural enamel. Composite resins are another aesthetic option, though they may not be as resilient in areas with high chewing pressure.
- Final Fitting and Bonding: The dentist checks the fit of the inlay, makes any necessary adjustments, and bonds it to the tooth using dental cement. Final polishing and bite adjustments ensure the restoration feels natural and functions properly.
This efficient process delivers immediate results, restoring both the appearance and functionality of your tooth in a single visit.
Benefits of Same-Day Inlays
Same-day CAD/CAM inlays offer several advantages over traditional methods, particularly in terms of convenience and comfort. Here’s why:
- Fewer Appointments: Unlike traditional inlays, which require two visits over 2–3 weeks for lab fabrication, same-day inlays are completed in just one visit.
- No Temporary Restorations: Temporary inlays, often uncomfortable and prone to dislodgement, are no longer necessary.
- Immediate Results: You leave the clinic with a fully restored tooth, able to eat and speak normally right away.
- Reduced Risk: The digital process minimises the chance of contamination or tooth sensitivity that can occur between multiple appointments.
- Natural Aesthetics: CAD/CAM inlays can be colour-matched to blend seamlessly with your natural teeth.
- Proven Durability: Research shows CAD/CAM inlays have survival rates exceeding 90% over 5–10 years, comparable to lab-made restorations [4].
| Feature | Traditional Inlay Placement | Same-Day CAD/CAM Inlay Placement |
|---|---|---|
| Number of Visits | 2 | 1 |
| Temporary Restoration | Yes | No |
| Turnaround Time | 2–3 weeks | 1–2 hours |
| Impression Method | Putty or digital | Digital |
| Material Options | Gold, ceramic, composite | Primarily ceramic, composite |
Cost and Availability in Australia
In Australia, same-day CAD/CAM inlays typically cost between A$900 and A$2,000 per tooth, slightly higher than traditional inlays due to the advanced technology involved. However, the time saved and the elimination of temporary restorations can help balance the expense.
More Australian dental practices are adopting chairside CAD/CAM systems to meet rising patient demand for quicker, more efficient treatments. Clinics like Complete Smiles Bella Vista offer these advanced procedures as part of their comprehensive dental care services, making modern restoration options more accessible for patients across the country.
Summary and Key Points
Understanding the inlay placement process equips you to make better decisions about your dental care. Whether you opt for traditional methods or the latest CAD/CAM technology, the ultimate aim is to restore your tooth’s strength, functionality, and appearance.
Overview of the Inlay Placement Process
The process of placing an inlay follows a structured approach to ensure effective results. With traditional methods, the dentist examines and prepares the tooth, places a temporary restoration, and later fits, bonds, and polishes the final inlay [1][2][3].
In contrast, modern CAD/CAM technology streamlines the process. A digital scanner maps your tooth’s exact dimensions, specialised software designs the inlay, and an in-office milling machine fabricates it from ceramic or composite material. This approach allows the entire procedure to be completed in a single visit, eliminating the need for temporary restorations or multiple appointments [2].
Both methods focus on achieving a precise fit and secure bonding. The dentist checks the inlay’s contact points with neighbouring teeth, evaluates your bite using articulating paper, and makes any necessary adjustments to ensure it feels natural and functions properly [5].
Why Choose Inlays?
Inlays offer distinct advantages when it comes to restoring moderately damaged teeth. One of their standout benefits is durability. Depending on the material and your oral hygiene, inlays can last between 10 and 30 years – far longer than traditional fillings, which typically last 5 to 10 years [3]. Additionally, inlays are more conservative than crowns, preserving more of your natural tooth structure while still providing excellent strength and functionality [3].
The success rate of inlays exceeds 90%, making them a reliable option [3]. Porcelain and composite inlays are particularly valued for their aesthetic appeal, blending seamlessly with natural teeth while resisting stains over time [3].
| Restoration Type | Durability | Aesthetics | Tooth Preservation | Cost (AUD) |
|---|---|---|---|---|
| Inlay | 10–30 years | High (porcelain/composite) | Preserves more natural tooth | A$900–A$2,000 |
| Filling | 5–10 years | Moderate | May remove more tooth structure | A$150–A$400 |
| Crown | 10–15 years | High | Requires more tooth reduction | A$1,200–A$2,500 |
Professional Dental Care
The success and longevity of an inlay restoration rely heavily on professional expertise and advanced techniques. Skilled dentists ensure accurate diagnosis, precise tooth preparation, and proper placement – all critical factors for achieving long-term results [3].
Many dental practices now incorporate CAD/CAM technology to improve both treatment quality and efficiency. For example, Complete Smiles Bella Vista, led by Dr. James Hanna, exemplifies the integration of cutting-edge technology with tailored treatment plans. When choosing a dental provider for inlay placement, look for clinics that combine experienced professionals with modern tools. This combination ensures durable, comfortable, and aesthetically pleasing results that can last for many years with proper care [3].
FAQs
What are the benefits of choosing a dental inlay instead of a traditional filling or crown?
A dental inlay is a reliable and precise way to restore damaged teeth, particularly when a filling isn’t quite enough, but a crown feels like overkill. Inlays are custom-designed to fit the cavity perfectly, creating a snug fit that not only strengthens the tooth but also improves its functionality.
When compared to traditional fillings, inlays tend to last longer and stand up better to wear and tear, making them a great option for molars or teeth that take on heavy chewing. Unlike crowns, which cover the entire tooth, inlays allow you to keep more of your natural tooth intact, offering a more conservative approach. They’re often made from materials like porcelain or composite resin, which can be closely matched to your tooth colour, giving you a natural and seamless look.
How does CAD/CAM technology enhance the dental inlay placement process?
CAD/CAM technology has transformed the dental inlay placement process, delivering a higher level of precision, efficiency, and patient comfort. By leveraging computer-aided design and manufacturing, dentists can craft inlays that fit teeth with exceptional accuracy, minimising the chances of error compared to older, manual techniques.
Another game-changer is the ability to complete many procedures in a single visit. With this technology, the inlay can be designed, milled, and bonded on the same day. This not only saves valuable time but also removes the need for temporary restorations, providing a smoother and more convenient experience for patients.
What should I consider when choosing the right material for a dental inlay?
When choosing a material for your dental inlay, it’s worth weighing up factors like durability, appearance, and cost. The most commonly used materials are porcelain, composite resin, and gold – each offering its own set of advantages.
Porcelain inlays are a favourite because they closely mimic the natural colour of teeth and are highly durable, making them a great choice for teeth that are easily visible. Composite resin, on the other hand, is a more budget-friendly option that also blends well with your natural teeth, though it may not hold up as well under long-term wear. Gold inlays stand out for their incredible strength and longevity, but their metallic look isn’t for everyone.
Your dentist will consider factors like the inlay’s location, how your teeth align, and your budget before recommending the best option for you. Be sure to have an open discussion about these choices to ensure you’re comfortable with your decision.
Related Blog Posts
- Wear-Resistant Materials in Dental Restorations
- What Is Digital Guided Implant Surgery?
- CAD/CAM in Dentistry: Cost vs Value
- CEREC Applications in Dentistry
Important Notice: Any surgical or invasive procedure carries risks. Before proceeding, you should seek a second opinion from an appropriately qualified health practitioner.
Individual results may vary. The information provided in this article is for educational purposes only and does not constitute medical advice.
Checkout Related Blogs



Get in touch with us
For more information, call us now to start feeling better. Or fill the form below to make appointment
The Latest News from Complete Smiles
How to Clean Clear Plastic Retainers
Checklist for Choosing Wearable Dental Devices
Checklist for Choosing Cloud AI Platforms in Dentistry
Complete Smiles Bella VistaAccepts All Major Health Funds, Including