




10 Tips for CAD/CAM Maintenance
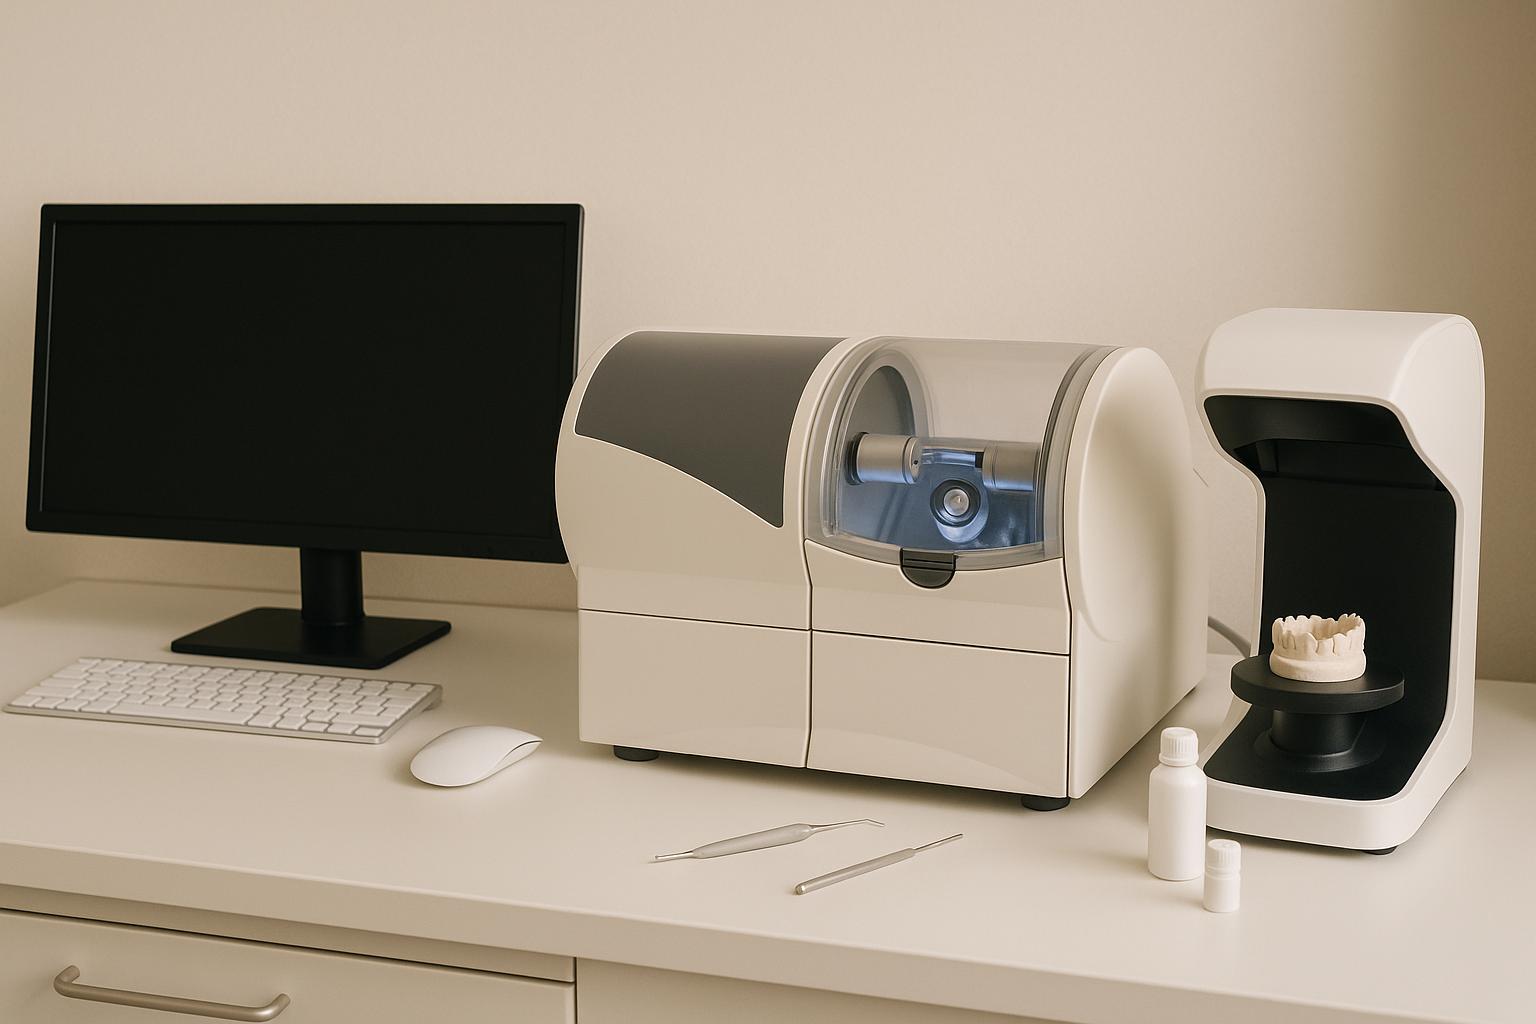
Maintaining your CAD/CAM system is crucial for precision, reliability, and cost savings. Neglecting regular upkeep can lead to costly repairs, reduced performance, and patient dissatisfaction. Here are 10 actionable tips to keep your equipment in top shape:
- Daily Cleaning: Clean the milling chamber with compressed air and a lint-free cloth to prevent debris build-up and tool wear.
- Replace Milling Burs Regularly: Follow usage guidelines to avoid reduced precision and increased material waste.
- Clean Scanner Lenses: Use microfibre cloths and approved solutions daily to ensure accurate digital impressions.
- Lubricate Moving Parts: Apply manufacturer-recommended lubricants to spindles and rails to reduce wear.
- Update Software: Check monthly for updates to improve system stability and avoid compatibility issues.
- Calibrate Tools: Perform monthly calibration to maintain accuracy and prevent misaligned restorations.
- Inspect Electrical Connections: Clean and secure connections monthly to avoid power issues and overheating.
- Control Room Conditions: Maintain 20–25°C and 40–60% humidity to protect components and ensure precision.
- Schedule Professional Servicing: Quarterly servicing by authorised technicians prevents major breakdowns.
- Back Up Data: Use the 3-2-1 backup rule daily to safeguard patient records and design files.
Key Takeaway: Regular maintenance not only extends the lifespan of your CAD/CAM equipment but also ensures consistent quality in patient care. Implement these tips to avoid downtime, reduce costs, and maintain high standards in your practice.
1. Clean the Milling Chamber Daily
The milling chamber tends to collect debris during restorations. If left unchecked, this buildup can harm the tools and internal components, leading to performance issues over time[4].
Frequency of Maintenance
Make it a habit to clean the milling chamber every day. This prevents debris from hardening and ensures the machine continues to operate smoothly[4].
Tools and Materials Required
You’ll need compressed air and a lint-free cloth for this task. Before starting, always ensure the machine is turned off and unplugged for safety[1].
Impact on Equipment Performance
Regular daily cleaning keeps the milling system operating at peak accuracy and minimises tool wear. For practices like Complete Smiles Bella Vista, where precision in restorations is essential, this simple step helps maintain high-quality results and extends the life of the equipment[4].
Potential Risks of Neglect
Skipping daily cleaning can lead to serious issues, such as tool breakage, spindle misalignment, and reduced quality in restorations. Over time, these problems can result in costly repairs and downtime[4].
By keeping the milling chamber spotless, you lay the groundwork for consistent performance and protect the system’s longevity.
| Cleaning Task | Tools Needed | Key Benefit | Risk if Skipped |
|---|---|---|---|
| Remove debris from chamber | Compressed air | Ensures precision | Tool wear and spindle misalignment |
| Wipe down surfaces | Lint-free cloth | Prevents debris buildup | Increased downtime and compromised quality |
| Inspect for residual particles | Visual inspection | Confirms thorough cleaning | Contaminated restorations |
2. Check and Replace Milling Burs on Schedule
Keeping your milling system in top shape isn’t just about cleaning – it’s also about replacing burs at the right time to ensure precision and quality.
Milling burs tend to wear out quickly, especially when working with hard dental materials. This wear can directly affect the quality of dental restorations[1].
Frequency of Maintenance
How often should you replace your burs? That depends on usage levels and the manufacturer’s recommendations. For high-usage environments, it’s a good idea to check them after a specific number of hours or jobs. Keep in mind that diamond burs usually outlast carbide ones. Sticking to the recommended cycles or hours is key to avoiding unexpected breakdowns[1][5].
Tools and Materials Required
Use magnification tools to inspect burs for early signs of wear, like chipping or a dull edge. Always stick to manufacturer-approved replacements – this not only protects your machine but also ensures you don’t void the warranty[1]. To minimise downtime, organise your replacement burs in a systematic way for quick access.
Impact on Equipment Performance
Sharp burs are essential for maintaining optimal milling performance and producing precise restorations. While some systems are equipped with smart sensors to monitor bur wear, manual inspections are still a reliable and necessary step[1][5].
Potential Risks of Neglect
Skipping regular bur maintenance can lead to a cascade of problems: reduced precision, faster wear on machine components, increased material waste, and unplanned downtime – all of which can be costly[1][5].
| Bur Condition | Restoration Quality | Machine Impact | Cost Implications |
|---|---|---|---|
| Sharp, well-maintained | Precise margins and smooth surfaces | Optimal performance | Minimal waste and rework |
| Moderately worn | Slight roughness, acceptable fit | Increased vibration | Higher material usage |
| Severely worn/damaged | Poor margins and rough surfaces | Potential spindle damage | Costly repairs and remakes |
3. Clean Scanner Lenses and Surfaces
Keeping scanner lenses spotless is crucial for capturing precise digital impressions. Even the tiniest bit of contamination can skew scan data, which might lead to poorly fitting restorations and the need for additional scans – costing time and effort.
Frequency of Maintenance
Make it a habit to clean your scanner daily. For busier practices, it’s a good idea to clean between patients if you notice any visible residue. Additionally, perform weekly calibration checks to ensure your scanner is functioning optimally[1][3].
Tools and Materials Required
Steer clear of household cleaners or generic wipes – they can harm the sensitive optical coatings and might even void your warranty. Instead, stick to optical microfibre cloths and cleaning solutions recommended by the manufacturer[1]. To remove dust or particles, start with compressed air, then finish with a lint-free wipe for a polished surface.
Impact on Equipment Performance
Regular maintenance keeps your scanner delivering sharp, detailed images by preserving its calibration and overall performance. Routine performance checks can confirm your scanner is working as it should, cutting down on retakes and streamlining your workflow[1].
Potential Risks of Neglect
Skipping regular cleaning can create a host of problems. Dust, debris, and residue on the lenses can distort images, leading to inaccurate impressions. This often results in repeated scans, longer chair times, and even permanent damage to the lens coatings, which could require costly repairs or replacements. Over time, consistent errors from neglected maintenance may result in ill-fitting restorations, potentially impacting patient satisfaction.
| Lens Condition | Scan Quality | Workflow Impact | Long-term Consequences |
|---|---|---|---|
| Clean and clear | Sharp, accurate images | Smooth workflow, minimal retakes | Reliable restoration results |
| Lightly contaminated | Slight distortions | Occasional retakes | Gradual decline in scanner performance |
| Heavily soiled | Poor, inaccurate data | Frequent retakes, extended time | Risk of permanent lens damage |
4. Lubricate Moving Parts Regularly
After cleaning and calibrating your equipment, regular lubrication is a must to keep everything running smoothly and avoid unexpected breakdowns.
Lubrication plays a key role in ensuring seamless CAD/CAM operations. Moving parts like spindles, guide rails, and tool holders endure a lot of wear and tear, so keeping them properly maintained helps maintain precision and extends their lifespan.
Frequency of Maintenance
How often you need to lubricate depends on your specific equipment and how heavily it’s used. For instance, some dental milling machines require daily collet maintenance, which involves cleaning and applying a small amount of grease to the taper of the collet [2]. Other components, such as guide rails and spindles, might only need lubrication weekly or monthly. Always stick to the manufacturer’s recommendations for the best results.
Tools and Materials Required
You’ll need a few basic tools for this task: a dry cloth, a collet brush, a taper cleaner, and a lubricant recommended by the manufacturer. Compressed air can also be handy for cleaning internal parts before applying the lubricant. It’s crucial to use only the lubricants specified in your manual to avoid damage or warranty issues. And don’t forget – always switch off and unplug the machine before starting any maintenance.
Impact on Equipment Performance
By reducing friction and wear, regular lubrication ensures that moving parts like spindles, collets, and guide rails work smoothly. This keeps the equipment calibrated and ensures consistent milling accuracy. When paired with daily cleaning, lubrication helps maintain the overall precision of your system.
Potential Risks of Neglect
Skipping or improperly performing lubrication can lead to a host of problems: milling inaccuracies, delays in production, and expensive repairs or part replacements. In extreme cases, neglecting maintenance can void warranties and even affect patient care, as precision is critical in dental procedures. Be careful not to overdo it either – excessive lubrication can attract dust and debris, while too little can accelerate wear and tear.
| Lubrication Status | Equipment Performance | Operational Impact | Long-term Consequences |
|---|---|---|---|
| Properly maintained | Smooth, precise operation | Consistent results, minimal downtime | Longer equipment lifespan |
| Under-lubricated | Increased friction, noise | Reduced accuracy, frequent adjustments | Early wear, costly repairs |
| Over-lubricated | Dust buildup, contamination | Cleaning challenges | Component damage, possible warranty issues |
5. Update Software and Firmware
Keeping your CAD/CAM software and firmware up to date is just as important as maintaining the physical components of your equipment. Regular updates improve system stability, boost security, and often introduce new features or streamline workflows. Updated software can fix known bugs, enhance milling precision, and reduce the likelihood of errors during the design and fabrication of dental restorations[1][3]. Running the latest versions ensures faster processing and smooth integration with your equipment. To avoid performance hiccups, stick to the recommended update schedule.
Frequency of Maintenance
Plan to check for updates at least once a month or as per the manufacturer’s recommendations[1][3]. Some manufacturers may release urgent updates more frequently, especially if they address security issues or major bugs. Assign a team member to monitor official manufacturer channels for update announcements. While many CAD/CAM systems now provide automated notifications and real-time feedback on updates[8], it’s still a good idea to visit manufacturers’ websites and support platforms to confirm your system is up to date.
Tools and Materials Required
Before starting an update, make sure you have the right tools on hand. You’ll need a computer with internet access, update utilities provided by the manufacturer, and backup storage devices that comply with Australian privacy laws[1][7]. Keep your user manual within reach for troubleshooting, and always download updates directly from the manufacturer to avoid compatibility issues. A stable power source is crucial, so consider using an uninterruptible power supply (UPS) to prevent interruptions during the update process.
Impact on Equipment Performance
Regular updates do more than just fix bugs – they enhance the overall performance of your system. Updated software and firmware improve reliability, speed up processing, and ensure greater accuracy in digital impressions and milling[1][8]. This means fewer system crashes and better handling of complex restoration designs. Updates often come with new features and expanded capabilities, making your workflow smoother and improving user experience[6][8]. Faster rendering speeds and better integration capabilities also mean quicker turnaround times and more precise restorations. Clinics like Complete Smiles Bella Vista (https://completesmilesbv.com.au) rely on these updates to consistently deliver high-quality care.
Potential Risks of Neglect
Skipping updates can lead to serious issues. Your system may become vulnerable to security threats, prone to errors, or incompatible with newer dental materials and workflows[1][3]. Outdated firmware can cause performance slowdowns, data corruption, or even equipment failure, all of which could negatively impact patient care and increase repair costs. Running outdated software also raises the risk of system crashes, data loss, and incompatibility with new hardware or file formats[6][1]. On top of that, neglecting updates could void your manufacturer warranty or support agreements, leaving your practice exposed to expensive repairs that could have been easily avoided with regular maintenance.
6. Calibrate Tools and Axes Monthly
Keeping your CAD/CAM system’s tools and axes properly calibrated is essential for creating accurate dental restorations. Calibration ensures precise movements and correct tool positioning, which are crucial for producing restorations that fit perfectly. Without regular calibration, even the most advanced equipment can lead to ill-fitting restorations, resulting in unhappy patients and expensive remakes.
Monthly calibration helps maintain the mechanical precision required to produce crowns, bridges, and other prosthetics that adhere to exact specifications. This process involves ensuring that all moving parts are aligned correctly and that cutting tools are positioned accurately relative to the workpiece. Many modern CAD/CAM systems come with built-in calibration routines and diagnostic tools, making it easier for dental professionals to keep their equipment in top condition[1].
Frequency of Maintenance
While monthly calibration is standard, systems that experience heavy use may require weekly checks, as outlined in the manufacturer’s guidelines[1][5][3]. The calibration schedule largely depends on how often the equipment is used and the manufacturer’s recommendations.
Consult your equipment’s user manual to determine the ideal calibration frequency for your system, as requirements can vary. Some advanced models even feature automated calibration reminders based on usage hours or cycles, helping to ensure maintenance isn’t overlooked[9]. Establishing a routine calibration schedule alongside regular cleaning and lubrication tasks is a great way to maintain alignment and ensure consistent performance.
Tools and Materials Required
Calibration requires specific tools and materials, often provided by the equipment manufacturer. These include calibration jigs for axis alignment[2][5], a clean, dry cloth for wiping surfaces, a collet brush for clearing debris, and a taper cleaner to maintain spindle accuracy.
Depending on the system, you may also need a small amount of lubricant or grease for moving parts, though this varies by manufacturer[2][5]. Access to your machine’s calibration software or control panel is vital, as most modern systems offer step-by-step digital guidance for the process[2]. Keep your user manual handy for troubleshooting and detailed instructions during calibration.
Impact on Equipment Performance
Regular calibration significantly improves equipment performance and the quality of restorations. It extends the lifespan of your machinery and reduces unexpected workflow interruptions[1]. This translates to smoother production schedules and fewer instances of downtime.
Properly calibrated equipment ensures more accurate restorations, cutting down on material waste and the need for remakes. Industry reports suggest that regular maintenance, including calibration, can lower the risk of unexpected equipment failures by up to 60%[6].
Potential Risks of Neglect
Skipping monthly calibration can lead to serious consequences for both your equipment and patient care. When axes fall out of alignment, inaccurate milling becomes unavoidable, resulting in poorly fitting restorations and an increase in remakes[1]. This wastes not only materials and time but can also damage your practice’s reputation for quality.
Neglecting calibration accelerates wear and tear on key components, increasing the likelihood of breakdowns. Emergency repairs often cost far more than the regular maintenance required to prevent them.
Patient outcomes are also at risk. Ill-fitting restorations may need multiple adjustments or complete remakes, prolonging treatment times and frustrating patients. For practices committed to delivering high-quality, personalised care – like Complete Smiles Bella Vista (https://completesmilesbv.com.au) – consistent calibration is non-negotiable.
Skipping calibration can even jeopardise your equipment’s warranty. Many manufacturers require documented proof of regular maintenance, including calibration records, to honour warranty claims. Failing to meet these requirements could leave your practice covering costly repairs out of pocket.
sbb-itb-2be92ed
7. Check and Clean Electrical Connections
The electrical connections in your CAD/CAM equipment are like its lifeline, powering all the critical components. Over time, dust, corrosion, or even vibrations can loosen these connections, causing voltage fluctuations that may impact the quality of your restorations. When connections are loose or corroded, they create resistance, which generates heat. This heat can damage sensitive parts, leading to intermittent failures or sudden shutdowns.
Frequency of Maintenance
Make it a habit to inspect electrical connections every month as part of your regular maintenance routine[1]. During these inspections, look closely at all visible connections for any signs of corrosion, wear, or looseness. If your equipment operates in high-humidity environments or dusty conditions and is used heavily, consider performing these checks even more often.
Tools and Materials Required
To clean and maintain your connections, you’ll need a few essentials:
- Compressed air: Perfect for removing dust and debris from connection points.
- Manufacturer-approved cleaning agents: These help safely remove corrosion and residue.
- Torch or magnifying device: Useful for spotting issues that might otherwise go unnoticed.
- Electrical contact cleaner spray and anti-corrosion treatment: Keep these handy for quick fixes.
- Replacement connectors: Having spares ensures you’re ready for immediate repairs if needed.
Impact on Equipment Performance
Just like keeping moving parts clean and lubricated ensures smooth operation, maintaining secure electrical connections is crucial for consistent performance. Properly maintained connections ensure steady power delivery to vital components like the spindle, motors, and control circuits. This translates to accurate calibration, precise tool positioning, and smooth axis movement during the milling process. Reliable electrical connections also help stabilise software and firmware, reducing the risk of unexpected errors or system crashes.
Potential Risks of Neglect
Skipping regular maintenance of electrical connections can lead to serious problems. Corroded or loose connections might cause inconsistent power supply, resulting in poor milling quality and wasted materials. Worse, the resistance from bad connections can create excessive heat, which could damage electronics, spindles, or even bearings – leading to costly repairs. Warning signs to watch for include corrosion, loose fittings, burning smells, or sparking. If you notice any of these, shut down the machine immediately and call a professional.
Taking the time to check and clean your electrical connections regularly can save you from unexpected downtime and ensure your CAD/CAM equipment runs reliably. It’s a simple step that pays off in the long run.
8. Control Temperature and Humidity
CAD/CAM systems are highly sensitive to their surroundings, meaning temperature shifts and humidity changes can disrupt calibration accuracy and reduce the lifespan of components. Keeping a stable environment isn’t just helpful – it’s essential for ensuring your equipment operates smoothly and reliably. Think of it as being just as important as regular cleaning and calibration.
The ideal environment for most CAD/CAM systems falls within a temperature range of 20°C to 25°C and a relative humidity level of 40% to 60%. These conditions help minimise issues like thermal expansion, static electricity, and moisture damage, which can all compromise performance and precision[4][1].
Frequency of Maintenance
It’s a good habit to check the environmental conditions in your equipment room daily, ideally at the same time each day. During periods of extreme weather – like Australia’s scorching summers or humid coastal seasons – consider monitoring twice daily. Reviewing your environmental logs weekly can also help you spot trends, such as gradual shifts in temperature or humidity, that might indicate problems with your HVAC system or external factors affecting your workspace[4][1].
Tools and Materials Required
Maintaining the right environment doesn’t have to break the bank. A basic digital hygrometer/thermometer, which costs around AUD $20–$50, can provide instant readings. Many of these devices even have memory functions to track highs and lows.
For more advanced monitoring, smart climate devices priced between AUD $100 and $300 can send alerts whenever conditions move outside the recommended range. If humidity is a recurring issue, you might invest in a portable dehumidifier (AUD $150–$400) to keep moisture levels in check. Similarly, small humidifiers are available at comparable prices for drier conditions. Data loggers can also be useful, automatically recording environmental data over time to help you detect subtle patterns that manual checks might miss.
Here’s a quick reference table to guide your environmental maintenance efforts:
| Factor | Recommended Range | Risks of Deviation | Mitigation Strategy |
|---|---|---|---|
| Temperature | 20–25°C | Component stress, condensation | Use HVAC, avoid direct sunlight |
| Humidity | 40–60% RH | Static, moisture damage | Use dehumidifier/humidifier |
Impact on Equipment Performance
Keeping environmental conditions stable can dramatically improve equipment performance and extend its life. For example, maintaining a consistent temperature prevents metal components from expanding or contracting, which helps preserve calibration accuracy and reduces wear on moving parts. Meanwhile, controlling humidity levels reduces static buildup that could harm sensitive electronics and prevents corrosion on metal surfaces. These efforts ensure your milling operations stay precise, so restorations produced today will match the accuracy of those milled in the future.
Potential Risks of Neglect
Ignoring environmental control can lead to a surge in equipment failures – up to 30% more, in fact. Signs of trouble include calibration drift, visible condensation, and even corrosion[4][1]. High humidity can result in moisture collecting inside delicate components, while low humidity increases the risk of static discharge damaging circuit boards. Extreme temperatures, on the other hand, can stress components, reducing overall precision.
Australian practices face unique challenges depending on their location. For instance, coastal clinics often deal with high humidity during summer, while inland facilities might experience dramatic temperature swings between seasons. Tailored environmental controls are crucial to protect these costly CAD/CAM systems.
If you notice any of these warning signs, check your environmental conditions immediately and adjust your climate control systems as needed. Many Australian clinics have made rigorous environmental monitoring a key part of their CAD/CAM maintenance routine, ensuring their systems continue to perform consistently and accurately.
9. Schedule Professional Servicing Quarterly
Once you’ve tackled daily maintenance and monthly calibration, it’s time to focus on quarterly professional servicing. This step involves in-depth system checks and adjustments that go beyond what can be done in-house, requiring specialised tools and expertise.
Frequency of Maintenance
Scheduling professional servicing every three months aligns with manufacturer guidelines and helps prevent minor issues from turning into major, costly problems[1]. Many dental practices in Australia choose to book these sessions during off-peak times to minimise disruptions to their daily operations.
On average, quarterly servicing costs between AUD $350 and $900 per visit, but it’s worth every dollar. Regular maintenance can reduce equipment failures by up to 30% and extend the lifespan of machines by as much as 20% compared to inconsistent upkeep[4]. Opting for preventive maintenance contracts can also help lower these costs over time.
Tools and Materials Required
When authorised technicians arrive, they come equipped with everything needed for thorough servicing. This includes precision calibration kits, advanced diagnostic tools, manufacturer-approved cleaning agents, and high-quality lubricants tailored to your equipment[1][2]. Practices often find that preventive maintenance contracts provide added value, offering discounted rates for regular check-ups.
Impact on Equipment Performance
Professional servicing is key to keeping your CAD/CAM technology running smoothly. During these visits, technicians conduct detailed inspections, replace critical components like spindles or bearings when necessary, perform deep cleaning of internal mechanisms, and run performance tests to ensure milling accuracy[1][2]. The result? Machines that work more efficiently, produce less waste, and deliver precise outcomes for even the most complex dental procedures.
Practices that make quarterly servicing part of their routine enjoy consistent performance, higher-quality results, and peace of mind knowing their equipment is reliable and safe for patient care.
Potential Risks of Neglect
Skipping quarterly professional servicing can lead to serious consequences. Increased wear and tear, reduced accuracy, and unexpected breakdowns can disrupt patient appointments and cost your practice anywhere from AUD $500 to $2,000 per incident in lost productivity and emergency repairs[1]. Over time, neglecting maintenance can even void your manufacturer warranty, leaving your practice financially vulnerable and potentially compromising patient outcomes.
The shift toward preventive maintenance contracts among Australian dental practices highlights a growing recognition: regular servicing isn’t just an expense; it’s an investment in reliability and performance[4][1]. Practices that prioritise this approach report fewer interruptions, more consistent results, and greater confidence in their technology’s capabilities.
10. Back Up Design Files and Patient Data
Protecting your digital workspace is just as important as maintaining physical components in your practice. Losing design files or patient data can bring operations to a standstill faster than a hardware issue. Ensuring the security of your digital assets is a key part of keeping your CAD/CAM systems running smoothly.
Frequency of Maintenance
Daily backups should be part of your end-of-day routine to prevent data loss. A smart approach is the 3-2-1 backup strategy: keep three copies of your data, store them on two different types of media, and ensure one copy is kept offsite or in the cloud. This method adds a layer of security to your data management.
Tools and Materials Required
To carry out effective backups, you’ll need a few essential tools. Reliable external drives, secure cloud storage services, and automated backup software that complies with Australian privacy laws are key. For physical backups, high-quality USB drives or Network Attached Storage (NAS) devices work well. It’s also important to have a written backup protocol and train staff on how to execute it. This ensures quick recovery if something goes wrong.
Impact on Equipment Performance
While backups don’t directly affect the mechanical performance of your CAD/CAM machines, they play a critical role in keeping your systems stable. Proper data management prevents system overloads and reduces the risk of crashes. If a failure does occur, comprehensive backups allow you to restore patient records and designs quickly, minimising downtime and helping maintain trust with your patients.
Potential Risks of Neglect
Skipping regular backups can lead to serious problems. Losing patient records, treatment plans, or custom dental designs can delay treatments and harm patient care. On top of that, breaches of Australian privacy laws could result in legal and regulatory troubles. Recovering from data loss incidents can cost practices anywhere from AUD $2,000 to $15,000 in lost productivity and emergency measures. Ransomware attacks are another growing threat – without current backups, recovery could take days and severely disrupt operations.
Conclusion
Regular maintenance of CAD/CAM systems is essential for maintaining high standards of patient care. By following the maintenance practices outlined earlier, you can protect your investment and keep your equipment running smoothly and reliably.
Practices that stick to a structured maintenance schedule tend to face fewer equipment breakdowns and enjoy lower long-term costs compared to those that only address problems when they arise [1][4]. Taking a proactive approach reduces interruptions to patient appointments and helps maintain efficient workflows. Preventive maintenance ensures your equipment continues to deliver the accuracy required for modern dental procedures, enabling you to confidently offer advanced care.
Think of maintenance as a critical part of your clinical protocols. Create a detailed, written checklist for maintenance tasks, assign specific responsibilities to your team, and maintain thorough records of all maintenance activities for troubleshooting and compliance purposes, as previously discussed. Keeping the equipment in a controlled environment and scheduling regular professional servicing will help you catch potential issues early, avoiding costly repairs down the line.
Investing in a CAD/CAM system is a major step toward modernising your dental practice. By adopting these maintenance habits, you ensure that your equipment remains a reliable and valuable tool. Regular upkeep not only reduces downtime and ensures consistent quality but also gives you the peace of mind that comes with dependable performance.
FAQs
How often should I have my CAD/CAM equipment serviced, and why is it important?
To keep your CAD/CAM equipment running smoothly and lasting longer, it’s a good idea to arrange professional servicing at least once a year. If your equipment sees heavy use, you might want to schedule it more frequently. Regular check-ups can catch potential problems early, helping your equipment run efficiently and cutting down on the chances of unexpected breakdowns.
Routine maintenance tasks like cleaning, calibration, and software updates are essential. These not only enhance the precision of your equipment but also help protect your investment for the long haul. Stick to the manufacturer’s recommendations and rely on a qualified technician to ensure everything stays in top condition.
What happens if I don’t regularly update the software and firmware on my CAD/CAM system?
Staying on top of software and firmware updates for your CAD/CAM system isn’t just a suggestion – it’s essential. Ignoring updates can slow down system performance, create compatibility headaches with newer files or tools, and leave your system exposed to potential security threats. Plus, skipping updates means you could miss out on bug fixes, new functionalities, or tweaks that improve the system’s precision and overall efficiency.
By keeping your CAD/CAM system up to date, you ensure it runs smoothly, maintains accuracy, and stays protected against vulnerabilities. Regular updates are a straightforward yet crucial step to safeguard your investment and keep your equipment performing at its best.
Why is it important to control temperature and humidity in the room where CAD/CAM systems are used?
Keeping the temperature and humidity in check within a room housing CAD/CAM systems is crucial for their performance and durability. Too much heat or moisture can disrupt the equipment’s precision, potentially causing calibration problems or even breakdowns.
A stable environment, maintained within the temperature and humidity levels suggested by the manufacturer, safeguards delicate components and ensures reliable, high-quality output. This is especially vital in fields like dentistry, where accuracy is non-negotiable for crafting precise restorations and devices.
Related Blog Posts
- Wear-Resistant Materials in Dental Restorations
- CAD/CAM in Dentistry: Cost vs Value
- Digital Workflow Disruptions: Quick Fixes for CAD/CAM
- Troubleshooting CAD/CAM Errors: Guide
Important Notice: Any surgical or invasive procedure carries risks. Before proceeding, you should seek a second opinion from an appropriately qualified health practitioner.
Individual results may vary. The information provided in this article is for educational purposes only and does not constitute medical advice.
Checkout Related Blogs



Get in touch with us
For more information, call us now to start feeling better. Or fill the form below to make appointment
The Latest News from Complete Smiles
How to Clean Clear Plastic Retainers
Checklist for Choosing Wearable Dental Devices
Checklist for Choosing Cloud AI Platforms in Dentistry
Complete Smiles Bella VistaAccepts All Major Health Funds, Including