


Post-Op Care for Guided Tissue Regeneration
After guided tissue regeneration (GTR), proper recovery steps are vital to protect the surgical site, reduce complications, and ensure successful healing. Here’s what you need to know:
- Pain and Swelling: Use ice packs for 20-minute intervals during the first 24–36 hours. Take prescribed pain medications as directed. Swelling peaks by day 4 and subsides within 7–10 days.
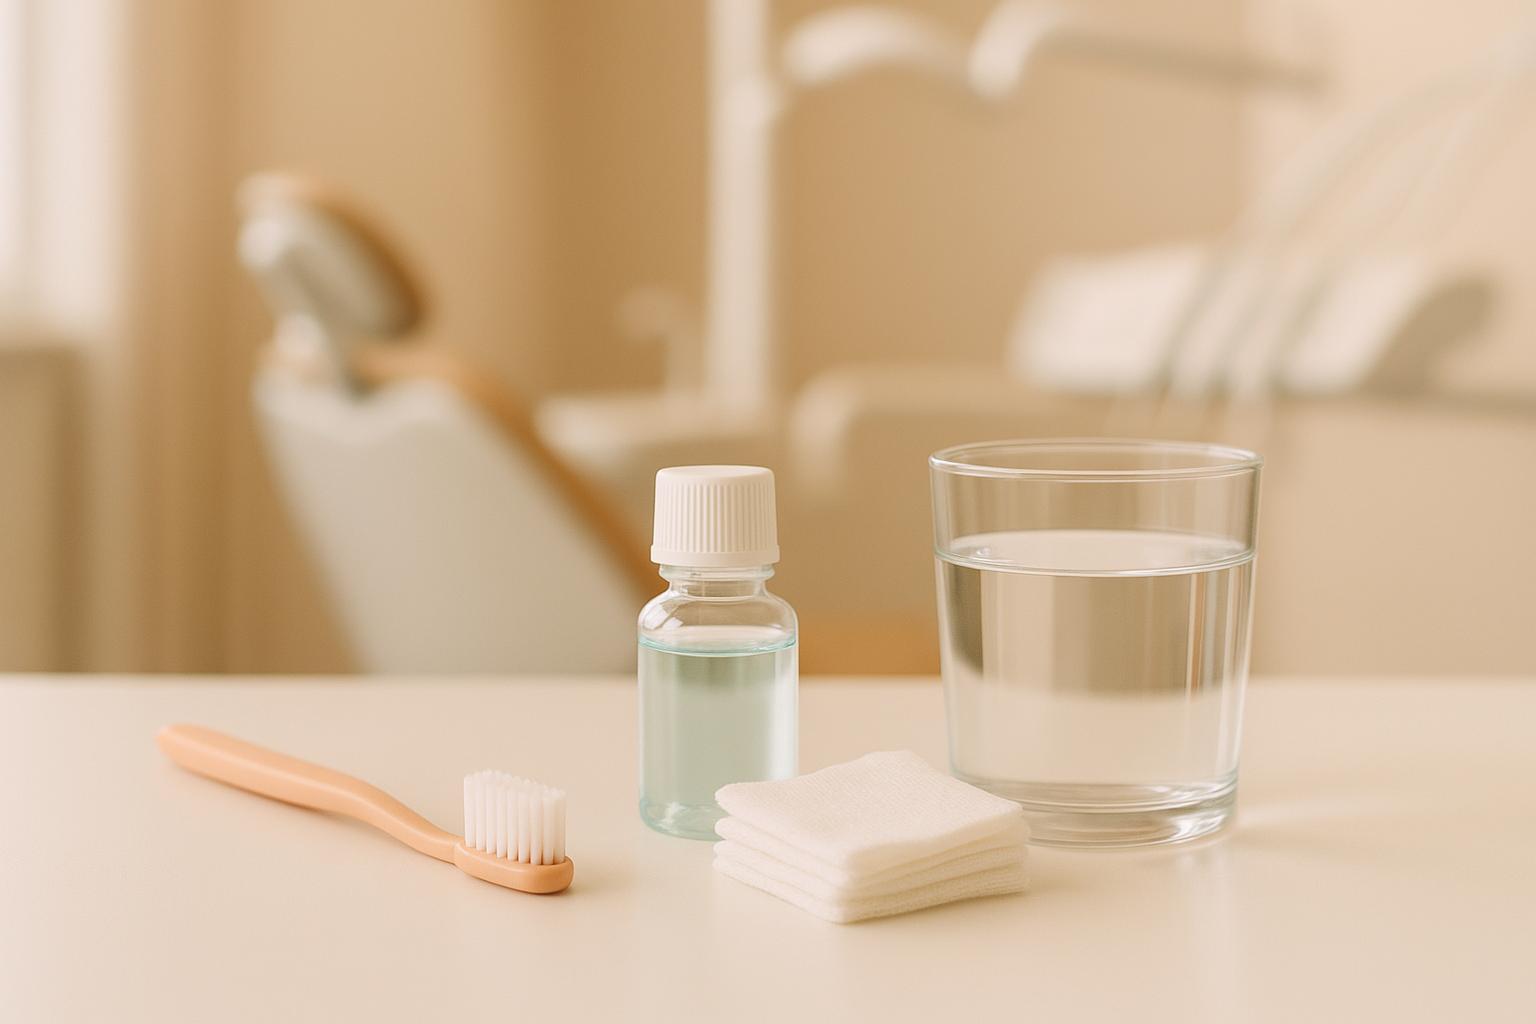
- Oral Hygiene: Avoid brushing the surgical area. Stick to gentle rinsing with a saltwater solution or prescribed mouthwash 24 hours after surgery. Avoid water flossers near the site for 4–8 months.
- Diet: Eat soft foods like mashed vegetables, yoghurt, and scrambled eggs. Avoid hard, spicy, or acidic foods, as well as alcohol and tobacco.
- Activity: Rest for at least three days. Avoid strenuous activities and actions that might disturb the surgical area.
- Warning Signs: Contact your dentist if you experience worsening pain, prolonged bleeding, swelling after the first week, or signs of infection like fever or pus.
Recovery timelines vary, but most people feel better within two weeks, with full healing taking 4–6 months. Follow-up appointments are essential to monitor progress. Whether resorbable or non-resorbable membranes were used, your dentist will guide you through tailored care based on your procedure.
How to Use Advanced Biotech Healiguide Guided Tissue Regeneration GTR Membrane
Immediate Post-Op Care Steps
After guided tissue regeneration, the first hours and days are crucial for recovery. Taking the right steps during this period can significantly influence how well and quickly you heal.
Managing Pain and Swelling
Discomfort and swelling are common after surgery, but there are effective ways to keep both under control. For the first 24–36 hours, use an ice pack on your cheek near the surgery site. Apply it for 20 minutes, then take a 20-minute break. This can help minimise swelling and ease discomfort [5].
Follow your medication plan carefully. Take prescribed pain relief, such as paracetamol or ibuprofen, with food, and never exceed the recommended dose. If you’re prescribed stronger painkillers, avoid driving or operating machinery while using them.
Swelling often peaks around the fourth day and usually begins to decrease by day 7–10 [5]. Some bruising may appear within 2–3 days and could last up to two weeks [5]. Keeping your head elevated while resting can further help reduce swelling.
It’s normal to experience slight bleeding in the first few hours after surgery. Gently bite on gauze placed over the surgical site, changing it every 30–45 minutes as needed [5]. If bleeding continues, try using a damp tea bag with gentle pressure for 30 minutes to encourage clotting [5].
Activity Limits
Rest is essential during the first few days. Avoid strenuous activities, heavy lifting, and vigorous exercise for at least three days [5]. Light, non-physical tasks can usually be resumed after 24 hours if you feel up to it, but overexertion can lead to increased bleeding or swelling, which may slow your recovery.
If you received IV sedation or are taking strong painkillers, you should avoid driving for at least 24 hours [3]. Refrain from any actions that could disturb the surgical site, including checking or touching the area, for at least seven days [5].
Prioritise sleep during this time, as it plays a key role in supporting your body’s natural healing processes.
Oral Hygiene During Recovery
After managing pain and swelling, keeping your mouth clean is essential to avoid infection and protect the delicate surgical area. Follow these specific steps to care for your treatment site effectively.
Cleaning the Surgery Site
Stick to a soft-bristled manual toothbrush during your recovery, and steer clear of electric toothbrushes or water flossers near the surgical area. These devices can disturb the healing tissues and should only be reintroduced when your dental professional gives the green light. Avoid brushing directly over the graft or membrane until you’re advised it’s safe.
Carefully clean the teeth around the surgical site, stopping before reaching the treated area to create a "no-touch" zone. Flossing near the surgical site should also be avoided until your dentist or periodontist says it’s okay. However, continue flossing the rest of your teeth to maintain overall oral health.
If your procedure included bone grafting, take extra precautions. Avoid using water flossers or applying any pressure to the surgical site for 4–8 months, giving the graft material time to integrate properly. Also, resist the temptation to poke the area with your tongue or pull your cheek or lip to inspect it for at least a week after surgery.
In addition to gentle brushing, a proper rinsing routine is crucial for protecting the healing tissues.
Mouth Rinsing
Begin rinsing gently 24 hours after surgery to encourage clot formation and early healing. Use a prescribed antimicrobial rinse, such as chlorhexidine (e.g., Peridex), or another product recommended by your dentist. Follow the instructions carefully, typically rinsing twice daily, to provide antibacterial protection while being gentle on the surgical area.
Alternatively, a warm saline rinse is a safe and soothing option. To make one, dissolve half a teaspoon of salt in a standard cup (about 250 mL) of warm water and rinse gently.
Avoid commercial mouthwashes containing alcohol, as their harsh ingredients can irritate the healing tissues, slow down recovery, and increase discomfort. Even some alcohol-free mouthwashes may contain ingredients that are too harsh during this sensitive period. When rinsing, do so gently – forceful swishing can disrupt healing.
You may notice a white film forming over the surgical site during recovery. This is a normal part of healing, so avoid trying to remove it aggressively.
| Oral Hygiene Method | Safety Level | Recommended Timing |
|---|---|---|
| Soft-bristled brushing (away from site) | Safe | As part of your regular routine (avoid the surgical site) |
| Prescribed antimicrobial rinse | Safe | Begin 24 hours post-surgery |
| Warm saline rinse | Safe | Begin 24 hours post-surgery |
| Commercial alcohol mouthwash | Unsafe | Avoid entirely |
| Water flosser near the surgical site | Not advised | Avoid for 4–8 months |
While focusing on the surgical site, don’t neglect the rest of your mouth. Continue brushing and flossing other areas as normal to prevent issues elsewhere. If you experience unusual pain, swelling, or bleeding, contact your dental provider promptly, as these could signal complications that need attention.
Diet Recommendations for Healing
After establishing thorough oral hygiene, your diet becomes a key factor in the next stage of recovery. What you eat not only protects the surgical area but also promotes tissue repair. For the first one to two weeks, sticking to a soft diet is essential to ensure smooth healing.
Foods to Avoid
Certain foods can interfere with recovery and should be avoided:
- Hard foods: Items like chips, nuts, toast, crackers, raw vegetables, and crusty bread can disrupt protective clots or irritate the surgical site.
- Spicy foods: Meals such as curries, chilli-based dishes, and hot sauces can cause discomfort and potentially slow the healing process by increasing inflammation.
- Hot foods and drinks: Consuming very hot soups, tea, or coffee can lead to swelling or minor bleeding. Allow these to cool to lukewarm (around 37°C) before eating or drinking.
- Acidic foods and beverages: Citrus fruits, tomatoes, vinegar-based dressings, and acidic juices can cause stinging and may delay healing.
Soft Diet Options
During recovery, focus on soft, easy-to-eat foods that provide essential nutrients without stressing the surgical area. Here are some great choices:
- Protein-rich soft foods: Scrambled eggs, soft tofu, yoghurt, and custard offer nutrients that aid tissue repair while being gentle on healing tissues.
- Mashed vegetables and pureed soups: Options like pumpkin soup, mashed sweet potato, and pureed peas are packed with vitamins and minerals. Ensure all vegetables are thoroughly cooked and mashed to avoid firm pieces.
- Soft carbohydrates: Foods like porridge, mashed potatoes, soft pasta, and Weet-Bix soaked in milk provide energy and are easy to chew.
- Smoothies and pureed foods: Blended soft fruits with yoghurt or milk make for nutritious and easy-to-consume meals. Avoid using straws, as the suction can disrupt healing. Other options include pureed soups, custard, and soft ice cream served at room temperature.
To minimise stress on the surgical site, chew on the opposite side and consider eating smaller, more frequent meals.
Here’s a quick summary of recommended and avoided foods:
| Food Category | Recommended | Avoid |
|---|---|---|
| Proteins | Scrambled eggs, soft tofu, yoghurt, custard | Hard or crunchy nuts |
| Vegetables | Mashed sweet potato, pumpkin soup, pureed peas (well-cooked) | Raw or crunchy vegetables |
| Carbohydrates | Porridge, mashed potatoes, soft pasta, Weet-Bix soaked in milk | Toast, crackers, crusty bread |
| Beverages | Water, lukewarm tea, milk | Hot drinks, acidic juices |
Avoiding Alcohol and Tobacco
Beyond food, certain substances can hinder recovery:
- Alcohol: Avoid alcohol for at least three days after surgery, or ideally throughout the healing period. Alcohol can reduce blood flow to the surgical site, delay tissue repair, and interfere with medications.
- Tobacco: Smoking decreases blood flow and oxygen delivery to healing tissues, increasing the risk of complications. Even minimal use can negatively impact recovery. If quitting is challenging, consult your healthcare provider for support.
Staying hydrated is equally important. Opt for water and non-acidic fluids at room temperature or lukewarm to avoid irritation.
These dietary adjustments are temporary but crucial for a smooth recovery. Most people can reintroduce firmer foods after one to two weeks, depending on their healing progress and advice from their dental specialist. For instance, at Complete Smiles Bella Vista (https://completesmilesbv.com.au), patients receive tailored dietary recommendations to aid their recovery journey.
sbb-itb-2be92ed
Monitoring Recovery and Spotting Problems
As you transition from immediate post-operative care to the longer healing phase, keeping a close eye on your recovery is essential. Regular monitoring after guided tissue regeneration helps ensure your healing stays on track and potential issues are addressed early.
Normal Healing Timeline
Healing typically takes about 4–6 months [1][5], but you’ll notice early recovery signs much sooner. In the first week, it’s common to experience swelling and minor bleeding, which should ease by days 7 to 10 [2][5]. Swelling usually peaks within the first four days and gradually subsides afterward [5]. Bruising may appear within the first 2–3 days and generally clears up in about a week, though it can last up to 14 days in some cases [5].
By the second week, most people feel almost back to normal [5]. However, it’s important to remember that while outward symptoms improve, internal healing – like the integration of the graft or membrane – continues throughout the 4–6 month period.
Warning Signs of Problems
Some discomfort is normal during recovery, but certain symptoms could signal complications requiring immediate attention. Contact your dentist if you notice any of the following:
- Pain that worsens or doesn’t improve after 3–7 days [5][2].
- Swelling that increases after the first week instead of decreasing [5].
- Signs of infection, such as pus, a foul taste or odour, or a fever above 38°C [5][2].
- Excessive bleeding or recurrent bleeding beyond minor spotting within the first 24 hours [5][2][3].
- Prolonged numbness, difficulty swallowing or opening your mouth, or if the graft or membrane becomes exposed or dislodged [5].
Trust your instincts – if something feels off, don’t hesitate to seek professional advice. Prompt follow-up can make all the difference in addressing complications effectively.
Follow-Up Appointments
Follow-up visits are a critical part of your recovery. Most Australian clinics schedule these at 1 week, 1 month, and then every 3–6 months to monitor your progress [1]. During these check-ups, your dentist will examine the surgical site for infection, ensure the graft or membrane remains stable, and assess overall tissue regeneration. Imaging tools like X-rays may also be used to track how well the bone and soft tissue are integrating.
The type of membrane used in your procedure plays a role in follow-up care. Resorbable membranes dissolve over time and usually require less attention, while non-resorbable membranes may need surgical removal and closer monitoring for exposure or infection [5].
These appointments are also an opportunity for professional cleanings, typically scheduled every 3–6 months. These cleanings help maintain oral hygiene and give your dental team the chance to catch any early signs of complications [1].
If you experience ongoing issues like membrane exposure or graft failure, consult a specialist. Clinics in Australia, such as Complete Smiles Bella Vista (https://completesmilesbv.com.au), offer comprehensive post-operative care and structured follow-up plans to support your recovery journey.
Membrane Types and Recovery Differences
Understanding the differences between membrane types can fine-tune your recovery plan and post-operative care. The type of membrane used directly impacts how your recovery progresses and the steps you’ll need to follow afterward.
Resorbable vs Non-Resorbable Membranes
The key difference between these two membrane types is whether they naturally dissolve or require surgical removal. Resorbable membranes break down on their own, typically within 4–6 months [1].
Non-resorbable membranes, however, are designed to remain intact throughout the healing process and beyond. Made from durable materials like expanded polytetrafluoroethylene (ePTFE), these membranes require a second surgical procedure for removal after healing [1]. Both types serve the same purpose: creating a barrier to prevent epithelial cells from migrating into the graft site [1].
| Membrane Type | Removal Required? | Healing Period | Advantages | Disadvantages |
|---|---|---|---|---|
| Resorbable | No | ~4-6 months | Avoids second surgery; reduces overall treatment time; uses biocompatible materials | May degrade prematurely in 5–15% of cases; less predictable barrier duration |
| Non-Resorbable | Yes | ~4-6 months | Provides greater durability and stability; more predictable barrier function | Requires additional surgery, increasing cost and recovery time |
These differences play a crucial role in shaping your recovery and determining the best approach for your specific situation.
The choice between resorbable and non-resorbable membranes depends on several factors, such as the size of the defect, whether you prefer to avoid additional surgery, cost considerations, and your dentist’s expertise [1][5]. For larger or more complex defects, non-resorbable membranes often provide the stability needed. In contrast, resorbable membranes are commonly used for simpler cases, offering greater convenience and comfort.
Both options have comparable success rates, ranging from 70–90%, depending on the characteristics of the defect and patient-specific factors [1][5]. Guided tissue regeneration has been a reliable approach in periodontal therapy since the 1980s. The introduction of resorbable membranes was a major step forward, as it eliminated the need for a second surgical procedure [5].
Resorbable membranes allow for a single recovery phase, reducing risks associated with additional surgeries. However, there is a small chance (5–15% of cases) that the membrane could degrade prematurely, which might impact the overall outcome [1].
Non-resorbable membranes, on the other hand, involve an initial healing phase, followed by a minor second surgery for removal, and then a shorter secondary recovery period. While this extends the treatment timeline, these membranes offer a more stable and predictable barrier function throughout healing [1][5].
Both types require careful post-operative care, but non-resorbable membranes demand stricter hygiene to minimise the risk of infection before the second procedure [1][5]. Your dentist will provide a clear timeline and detailed instructions tailored to your specific membrane type, ensuring you’re fully informed about what to expect, including whether a follow-up surgery will be necessary.
Summary and Key Points
Here’s a quick recap of the essential post-operative care instructions to help ensure a smooth recovery. These guidelines, covering immediate care, oral hygiene, diet, and follow-ups, aim to support proper healing.
To protect the surgical site during the first 24 hours, avoid rinsing, spitting, or using straws. These actions can disrupt the clotting process and delay healing [1][2][3][5].
For pain and swelling, apply ice packs in 20-minute intervals during the first 24–36 hours. Swelling typically peaks within a few days and starts improving significantly by the second week, though full recovery may take longer [2][3][5].
Stick to a soft and nutritious diet to aid tissue repair. Foods like yoghurt, mashed potatoes, and scrambled eggs are ideal. Avoid hot, spicy, hard, or acidic foods, and steer clear of alcohol and tobacco, as they can slow healing and increase the risk of infection [1][2][3][5].
Refrain from strenuous activities for at least three days. Exercise can increase bleeding and swelling, which may interfere with recovery [1][2][5].
After the first 24 hours, carefully maintain oral hygiene. Use a prescribed mouthwash or warm salt water to rinse gently, but avoid using water-flossing devices near the surgical site for several months to prevent complications [1][2][3][4][5].
If you experience persistent heavy bleeding, increased pain or swelling after the first few days, or signs of infection like fever or pus, contact your dentist immediately [2][5].
Regular follow-up appointments are essential to monitor your recovery. Your dentist will advise on the timing, which may depend on whether resorbable or non-resorbable membranes were used.
Keep in mind that a white film over the surgical site is a normal part of healing, and any bruising may take up to 14 days to fade [2][5].
FAQs
What should I do if pain or swelling persists longer than expected after my guided tissue regeneration procedure?
If your pain or swelling isn’t getting better within the usual recovery period, make sure to get in touch with your dentist or dental specialist right away. They’ll evaluate how your healing is going and decide if any extra care or treatment is necessary.
Putting off a follow-up could result in complications, so it’s always better to seek advice sooner rather than later. Your dental team is there to guide you through recovery and help you achieve the best results.
How can I tell if the membrane used in my guided tissue regeneration is resorbable or non-resorbable, and what does this mean for my recovery?
The kind of membrane used in your guided tissue regeneration procedure – whether resorbable or non-resorbable – plays a role in your recovery. A resorbable membrane gradually dissolves on its own, so there’s no need for a follow-up removal. On the other hand, a non-resorbable membrane will require a follow-up appointment with your dentist or specialist to have it removed once healing is complete.
Your dentist will explain which type of membrane was used and provide detailed aftercare instructions. If you’re unsure or have any concerns, it’s always a good idea to contact your dentist for clarification and support to ensure smooth healing.
Why should you avoid using a water flosser near the surgical site after guided tissue regeneration?
Using a water flosser around a surgical site can hinder healing and may even dislodge the delicate tissue or graft material placed during the procedure. The strong water pressure can disturb the stabilisation of the area, which is essential for proper recovery.
To safeguard the surgical site, stick to your dentist’s aftercare instructions. These might involve gentle cleaning methods, such as using a soft-bristled toothbrush or rinsing with a prescribed mouthwash. Before reintroducing any dental tools near the treated area, always check with your dentist.
Related Blog Posts
- Soft Tissue Grafting: Indications Explained
- Gum Grafting Healing Stages: Day-by-Day Guide
- Soft Tissue Grafting: Pre-Surgery Evaluation Explained
- Clinical Criteria for Guided Tissue Regeneration
Important Notice: Any surgical or invasive procedure carries risks. Before proceeding, you should seek a second opinion from an appropriately qualified health practitioner.
Individual results may vary. The information provided in this article is for educational purposes only and does not constitute medical advice.
Checkout Related Blogs


Get in touch with us
For more information, call us now to start feeling better. Or fill the form below to make appointment
The Latest News from Complete Smiles
How to Clean Clear Plastic Retainers
Checklist for Choosing Wearable Dental Devices
Checklist for Choosing Cloud AI Platforms in Dentistry

Complete Smiles Bella VistaAccepts All Major Health Funds, Including


